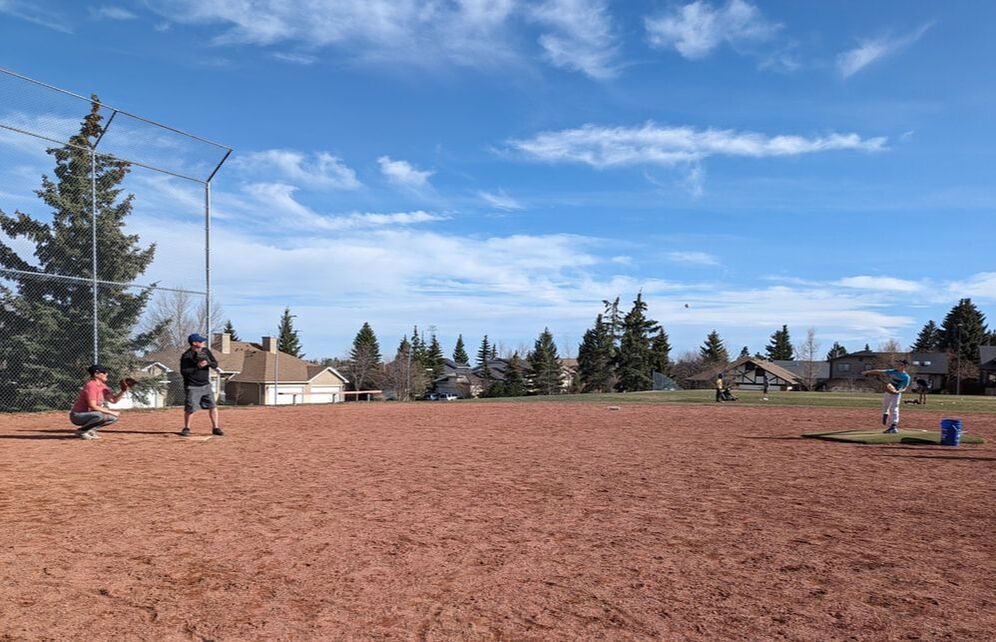
 Is this your view this spring? If you have kids in spring sports, you likely spend many evenings watching from the sidelines. Here are a few tips to prioritize your movement health while still cheering on your favourite player:
1. Bring yoga tune-up balls (or a tennis ball) - you can roll your glutes, calves, feet and more while you sit 2. Do the same warm-up stretches as the team, from the sidelines. 3. Climb the bleachers before and after the game. Focus on pressing your weight into your heel as you go up and protecting your knees when coming down. 4. Consider sitting on the ground on a blanket instead of in the bleachers or a camping chair. Just by removing the support of a chair or bench under you, your body has to find new ranges of motion and it will encourage you to change position more often. 5. Bring a toddler along and keep them from running onto the field the whole time!
0 Comments
 I am three months post-op of an unexpected epigastric hernia repair surgery. One of the most frustrating things about my recovery period was the lack of information on rehabilitation. I simply wasn't given much information from the hospital other than "don't lift anything heavy for 6 weeks". Covid has further complicated things; I was discharged less than 10 hours after my surgery and the only follow-up I had was a telehealth call with the surgeon 6 weeks later.
So, I created my own program for rehabilitation. If you'd like a copy of the protocol I created and followed for gentle core rehab, click here! (Full disclaimer, this is not medical advice. As a kinesiologist, I am trained to give instruction on exercise but always ask your doctor or surgeon before starting a new exercise program). 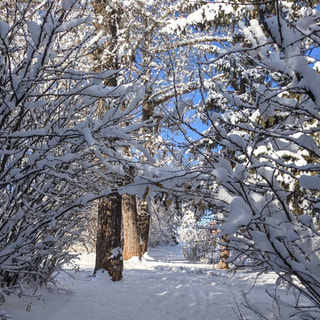 "If you choose not to find joy in the snow, you will have less joy in your life, but still the same amount of snow"
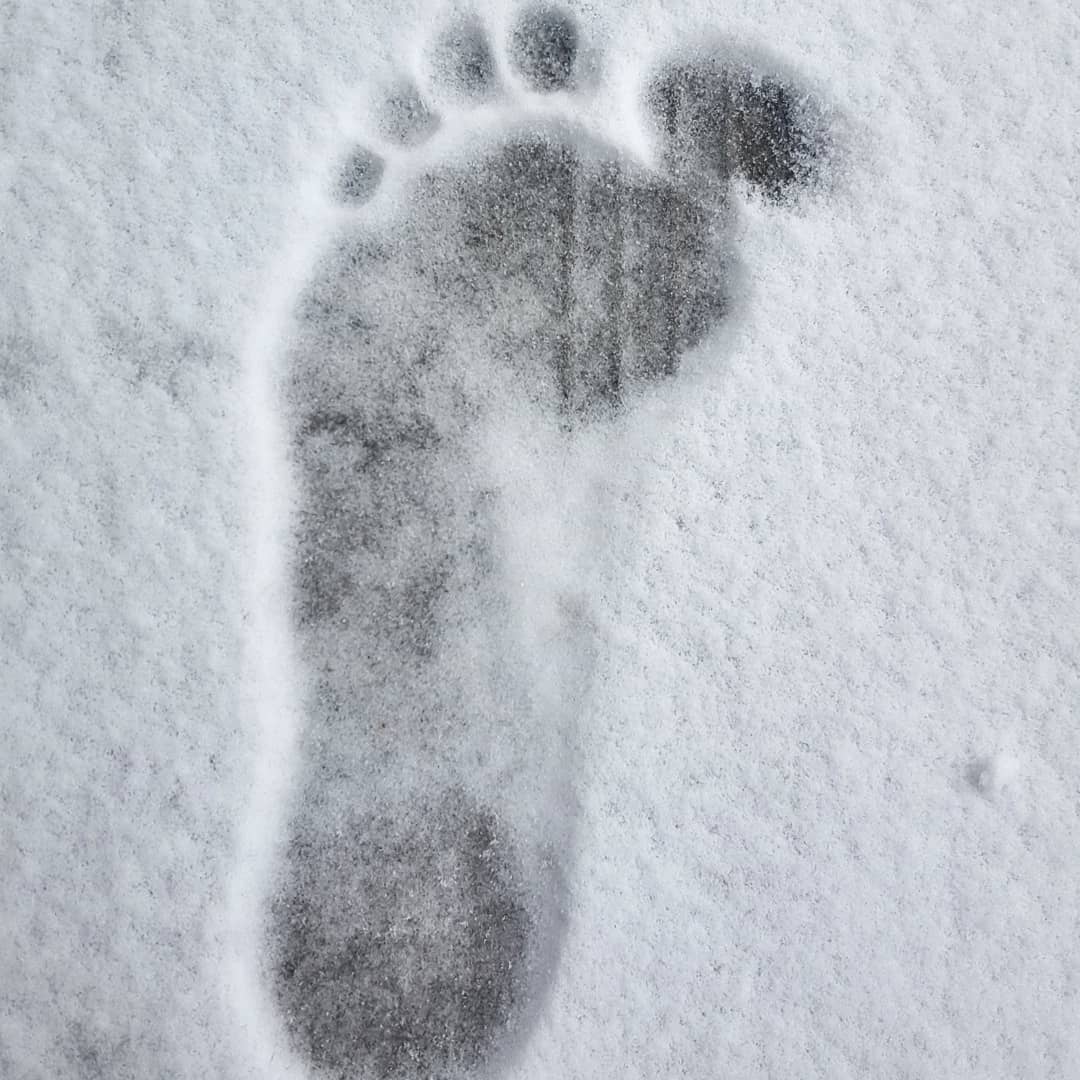
-Anonymous We are well into winter weather here in Calgary. I offer year round nature walks to encourage people to opt outside and enjoy nature (and #vitamincommunity!) but I definitely have less participation in the winter. Here are some tips on winter walking to help ease your mind while walking outdoors in the winter. #1 Invest in a good pair of traction aids I have used both Yaktrax and IceTrekkers, both available at MEC. They slip right on to the bottom of your boots and will help you feel more confident as you walk on slippery sidewalks. #2 Commit to getting outside DAILY Even if it's only for 5 minutes. No matter the temperature. We all need fresh air and movement. Everyday. This is important for all ages! #3 Make it social Schedule a walk with a friend. Or join me. Winter is a time of increased loneliness and scheduling a visit with a friend combined with a walk is a great way to #stackyourlife. #4 Choose a good route If your community sidewalks are often unshoveled or icy, choose a city pathway that is cleared year round. You can find a list here. These paths are cleared within 24 hours of a snowfall. #5 Keep your Weight in your Heels Keeping your weight back in your heels and keeping your pelvis stable will allow you to step forward and examine the ground of your next step before placing your weight on the front foot. Want to practice indoors? Work on your pelvic list. #6 Slow Down (but not like a penguin) Slow down. Take time to notice the terrain in front of you. Choose snow over ice for better traction and try to maintain a posterior-push off during your gait cycle (use your glutes and keep your feet pointed forward, but don't lean forward (see tip #5)). I often see advice to 'walk like a penguin' but turning out your feet and shuffling will decrease the movement nutrients of your walk. #7 Have fun! "We don't stop playing because we get old. We get old because we stop playing" -George Bernard Shaw So pick up a snowball. Throw it at a tree. Make a snow angel. Allow yourself to breathe in the cold air. Warm up after a nice winter walk with hot tea and enjoy the things about winter that you enjoyed as a child. Want to practice walking in winter? Join me for Woods Wednesdays or my monthly nature meet-up; all current free nature walks are always posted on my website and Facebook page. 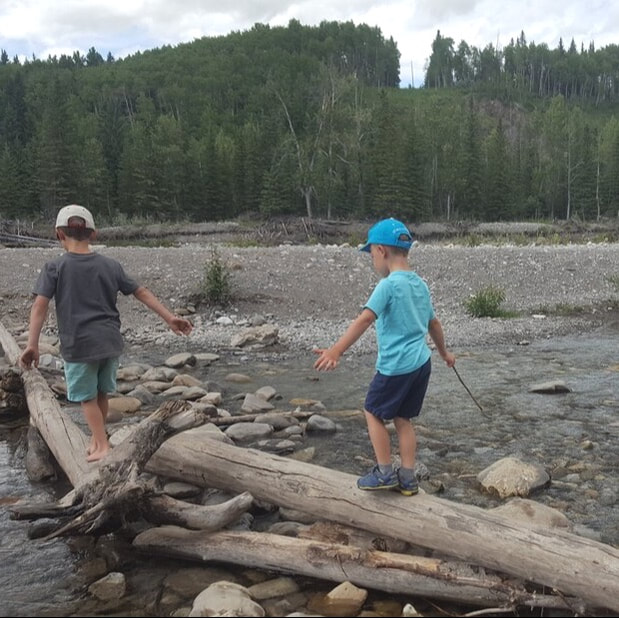 People ask me all the time how I convince my kids to be outside so much. The #1 thing I've learned in almost 8 years of trying to raise nature loving kids is that my children need to see me outside. They need to see me climbing and playing and enjoying being outdoors in all weather. They need to see me turn to nature when I'm stressed. As a parent, I need to choose family activities that prioritize moving through the outdoors and set firm boundaries on indoor distractions (goodbye excessive screen time). I need to cater to their interests in a way that changes their habitat and everyday routine to one that includes the outdoors, year round. Here are some tips on how to encourage your kids (or anyone in your household for that matter!) to spend more time outside. 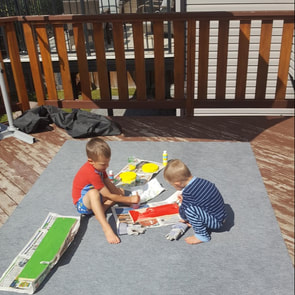 1. Take everyday activities outside. Chopping vegetables, painting, eating lunch and even curling up to read a book together are some of the things that we choose to do outside whenever possible. 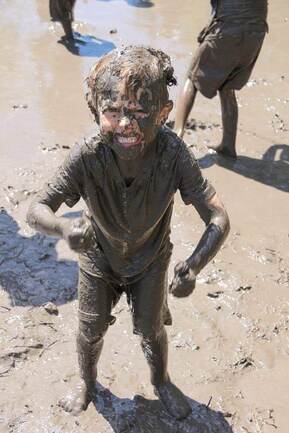 2. Be okay with dirt! Kids LOVE to get dirty! Give them a safe space to play in the mud without them worrying that they are going to get in trouble for wrecking a nice shirt.  3. Start fun family traditions that require being outside. Every year around Halloween, we go on a family nature walk in the woods wearing costumes. My kids get just as excited about our costume walk as they do about trick or treating. There is magic in pretending to be a lion or bumblebee or a fire breathing dragon in the woods. We have traditions that center around nature for Valentine's Day, Earth Day, Christmas and more. Create some for your family! 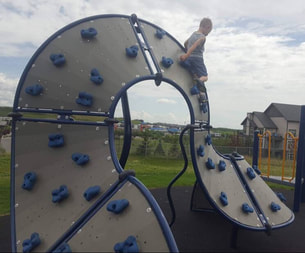 4. Go playground hunting! We are so lucky in Calgary that so many communities have wonderful playgrounds and there are endless options to explore. Every time I am in a new area of the city, I make sure to check out the map before I go and find a playground we've never been to. *This one is at Guardian Angel School in Aspen (SW) 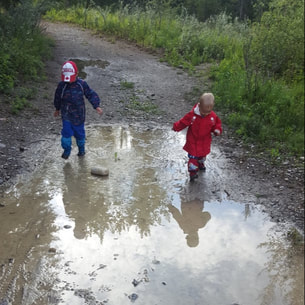 5. Get outside in all weather. Your attitude towards the weather will determine theirs. If they only hear complaining about cold, snow and rain, they won't know the joy of splashing through puddles or catching snowflakes on their tongues! 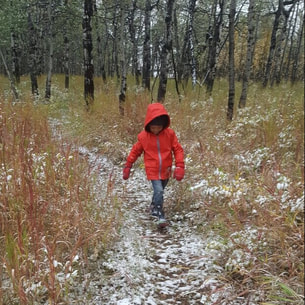 6. Change your routine to #stackyourlife and require outdoor movement. We have chosen schools that are within walking distance of our home and used the half an hour between drop offs to walk through the woods. Other ideas? Walk as much as possible. Park a few blocks away from your destination. Park at a central location and walk to the post office, grocery store or restaurant. A bonus of bountiful outdoor time? My kids listen so much better, don't fight as much and sleep better when they have satisfied their need for movement and nature time. How do you get your kids outside? Share your ideas in the comments!
We drove almost 2000km in Texas for spring break. From Dallas to Midland to San Antonio to Austin and back to Dallas and many places in-between. I wrote an article last year about how to increase movement while in the vehicle on a road trip and how to 'un-do' the effects of sitting when you arrive at your destination. You can find that article here. This article will give suggestions on what to do during a movement break when you stop along the way. We always try to stop at least every 2 hours, even if it's a 5 minute break. Here is the routine I run through when we stop: 1. Find something to stretch your calves on - a rock, a tree root or a small hill work great. Your car tire will work if there's nothing else. 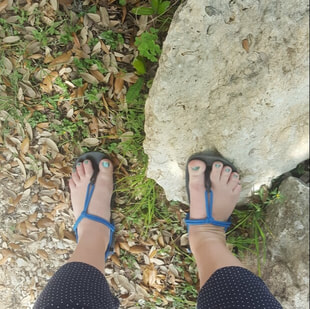 2. Stretch your hamstrings - a rock, park bench or even your car work great. Keep your spine in neutral, legs straight and hinge at your hips 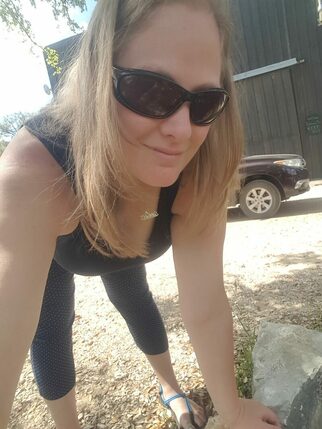 3. Squat A squat feels great to loosen up after sitting in a vehicle. If you're unable to fully squat, use whatever you used to stretch your calves to bolster your heels, or hold on to a tree or your car door for a supported squat 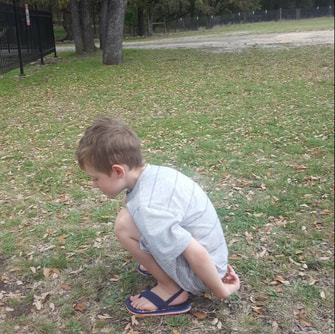 4. Stretch your thoracic spine -grab on to a tree or put your hands on the hood of the car and hinge from the hips. Very similar to the hamstring stretch but adding in the upper spine. And relax your neck! (don't look at the camera unless you're trying to take a selfie while your kids play beside a giant dinosaur!) 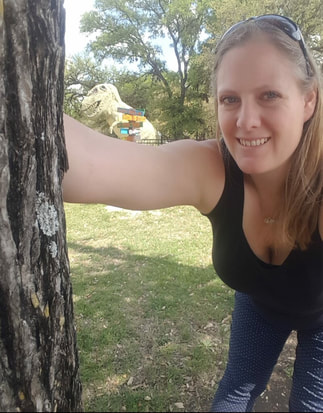 5. Balance on something -rocks, logs, or a parking meridian are good options 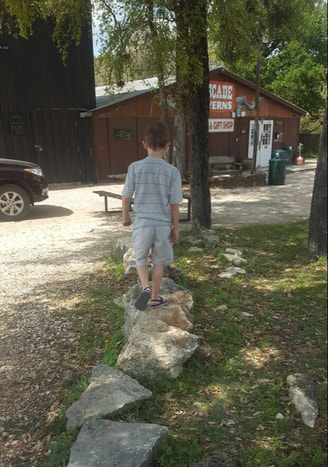 6. Go for a short walk. Or a long one. 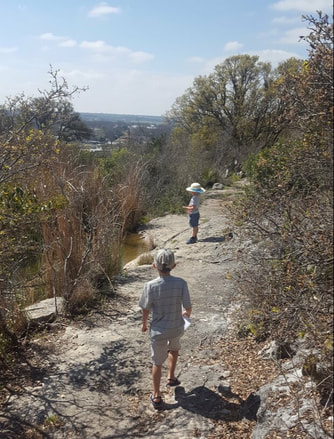 7. Play! 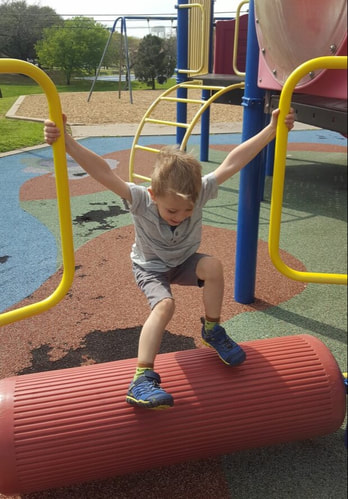 We try to plan our route to get off the beaten path, and look for green spaces instead of just stopping at a gas station or rest stop. Planning for extra time for movement breaks makes a road trip so much more enjoyable!
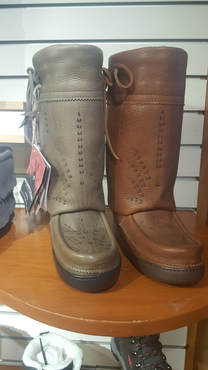
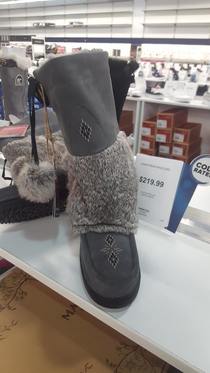
How do you keep moving while on a road trip? 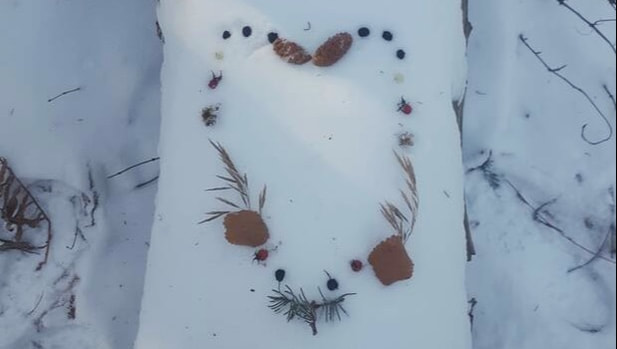 Pregnancy Loss. Miscarriage. A taboo subject that is too often hidden in silence. I was blissfully naive in my first two pregnancies, knowing there was a risk but carrying both my boys to past 40 weeks with no worries about losing the pregnancy. In fact, I suffered from HG (hyperemesis gravadarum) and had many people tell me being 'sick' was a good sign. I have now suffered two miscarriages in the past 6 months. The most recent, at the end of January, was preceeded by almost a month of debilitating nausea and severe food aversions that gave me a false sense of security about the pregnancy. After both losses, I felt very disconnected from my body. Betrayed. Movement has been instrumental in helping me regain the connection of my heart, mind and body. The physical recovery after miscarriage will depend a lot on how far along you were, if you miscarried naturally or needed medical intervention, how much blood you lost, etc. There is no set time limit for emotional recovery. Please seek out medical care as needed. I can only speak to my own experience after 6 week and 9.5 week losses. The following exercises helped me start moving again, and reconnect to my body after a physically and emotionally traumatic experience. Connection Breath/Thoracic Deep Breathing Lie comfortably on your back, bolstering your head and shoulders as needed (a half foam roller or rolled up towel or blanket work well). With one hand on your belly and one hand on the side of your ribcage, inhale and notice where your breath goes. Do your ribs expand? Does your belly rise? Aim to feel more air in your ribs and less all in your belly. As you exhale, slowly and completely until you have no more breath to push out, notice if you feel a reflexive tightening of your core and/or pelvic floor. Breathing in this way simply helps you connect your breath to the function of your core and pelvic floor. It helps you tune in to the sensations in the ribcage, abdomen and pelvic floor muscles. Psoas Release Bolster your head and shoulders so that your torso is high enough that your hamstrings make full contact with the floor (legs are straight). Place the bolstering (pillows, blankets) so that your lower ribs are able to reach towards the ground and your shoulders and neck are supported. Let the front of your ribs relax into the flesh of your abdomen. Breathe, allowing the back of your ribs to relax down towards the floor. This is not an active stretch - you may not feel anything. It is simply putting your body in a position where your psoas is able to relax. Legs on the Wall Lie on your back with your legs on a wall. Back away from the wall as much as necessary to allow your pelvis to be in neutral (not tucked or untucked) and bolster your head and shoulders as necessary. Allow your legs to make a 'V' on the wall. Breathe. Move your legs in and out of the 'V' as needed. 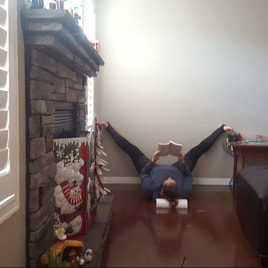 Abdominal Release After both miscarriages, I found myself retreating to the ingrained habit of holding tension in my abdomen after working very diligently in the past few years to overcome it. Start on your hands and knees, and allow your belly to r-e-l-a-x. Let it all hang out. Check to make sure your hands are under your shoulders and your knees are under your hips. Then check in again with your abdomen - has it 'sucked in' again without you even thinking about it? Constantly holding tension in our abdomen negatively affects the function of the core and pelvic floor musculature. Let it hang out! You want your core to engage as necessary based on the loads placed upon it, not to constantly be under pressure. Bolstered Pullover This exercise is great because you can change the weight of whatever you are holding to increase or decrease the intensity. Lie on your back, bolstered as needed, and keeping your ribs stabilized (don't let them thrust), lift and lower the object over your head with arms straight. 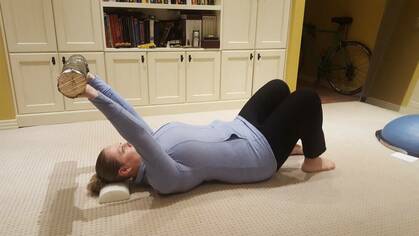 Click Clack I use a half foam roller for this exercise, but if you don't have one, sitting on a chair on a rolled up blanket or towel will work. Sitting on something (low stool, chair) will decrease the work needed in the hip flexors for this exercise. Place the half foam roller under your 'sit' bones with the rounded side down. Place your feet on the floor in front of you with bent knees. With your hands on the outside of your knees, lean back until your arms are straight. Tuck and untuck your pelvis, leading the move by digging your heels into the ground. Do not thrust your ribs and do not pull with your arms (keep them straight). Only your pelvis is moving. Calf Stretch Stand beside the half foam roller/half dome (or a rolled up towel or pool noodle) and place the ball of your foot on the apex of the dome. Align your feet so the outside edges are straight. Start with the foot not on the dome behind you, and slowly inch forward until you feel a gentle stretch in the back of your calf. Depending on the tension in your calves, your foot not on the dome may be behind you, beside the dome, or slightly in front of the dome. The length of your calves affect the position of your pelvis. This is a stretch I try to do multiple times a day. With extra sitting while recovering from miscarriage, I found my calves got really tight. 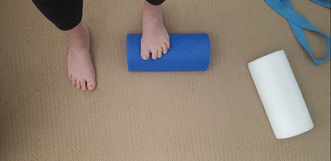 Crawling Start on your hands and knees, making sure your wrists are directly under your shoulders and your knees are under your hips. Keep your pelvis and ribs in neutral. Inhale, and halfway through the exhale when you start to feel your reflexive core kick in, lift one hand 1” off the floor. Continue to breathe! Repeat with the other hand, then one knee at a time. If your wrists aren't used to bearing the weight of your upper body, you can bolster them as needed with rolled up yoga mat or use ‘fists’. - Progress to lifting one hand and the opposite knee at the same time. - Progress to slow crawling, forwards and backwards, paying attention to your breathing and core engagement. Crawling is a fantastic exercise to build core strength! Walking Getting outside for a walk helps not just physically, but emotionally as well. Fresh air, nature and the coordination of many muscles and systems helped me to reconnect to my body. To help me trust my body again. Even short walks (my first was a few houses up and back), can help to encourage healing. Listen to your body. You will know when you are ready to increase the length of your walks. For me, it was a good two weeks before I could walk for more than 10 minutes after my most recent loss. After the first loss, I felt fine after a few days. This list of exercises is helpful to those who are recovering from a pregnancy loss, but are also a good start for anyone wanting to improve the function of their core and pelvic floor. If you have experienced a pregnancy loss and are suffering alone, please reach out. Although miscarriage is common, it is a heart-breaking loss. Questions? Comments? Please share! 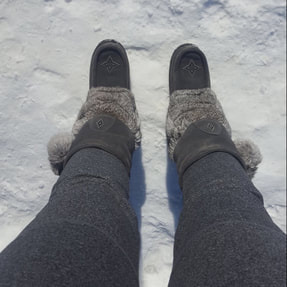 Flat, flexible and wide winter boots allow your feet to move over the bumpy terrain of snow and ice, and keep your feet warm because they are moving! My favourites are below. If you find something awesome locally, let me know! Manitobah Mukluks These boots have vibram soles, and come in many different styles and heights. I have seen them locally in Calgary at the Bay, Sporting Life, The Shoe Company and Brown's Shoes. They are available online at https://www.manitobah.ca. I have the waterproof snowy owl and I love them!
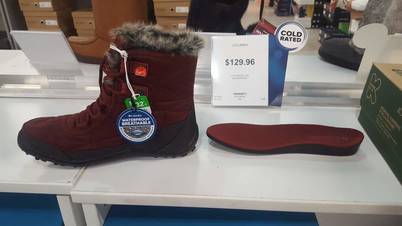
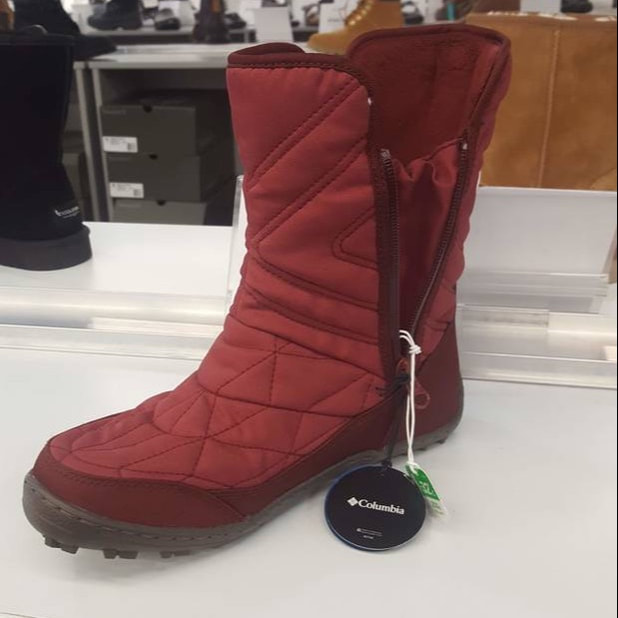
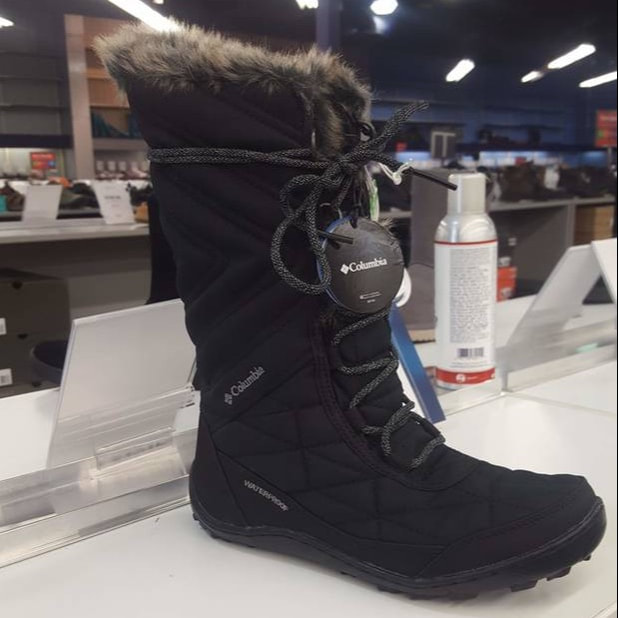
Columbia Minx The Columbia Minx comes in short, mid, and tall lengths, in different colours. They are flat and flexible, if you take out the insole and replace it with a flat one (as it has a hidden 1" heel). I have tall black lace up ones and mid calf grey ones and although they need a new spray with waterproofing for this winter, they have held up really well for the past 2 winters. They are available locally at The Shoe Company, Cabela's, and Soft Moc. They also make a girls (youth) version.
 Soft Star Phoenix Boot Soft Star is a minimal shoe company located in Oregon. They make adult and children's sizes, you can customize colours, and shipping is FREE! Click here for their website. 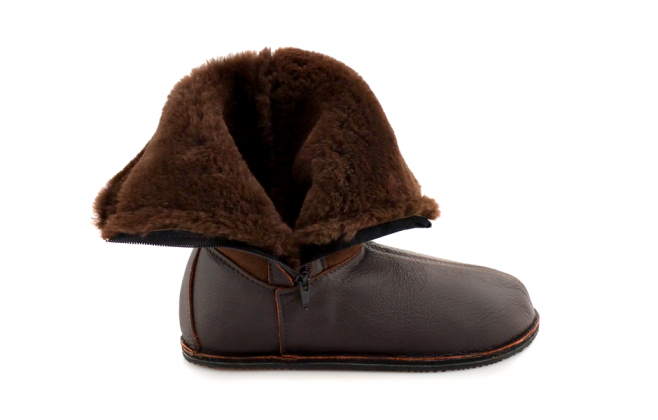 My kids wear whatever I can find that season that is 'good enough' for minimal shoes. They are rarely in their winter boots for an entire day, and their indoor school shoes are always minimal. With the expense of buying new boots every winter for growing feet, I have a hard time investing in $150+ boots every year. I look for flexible soles and as flat as possible. Here's what I found this year for my 7 year old: 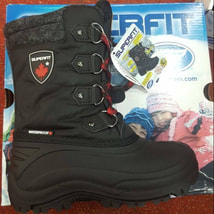 The sole is flexible and the heel rise is minimal (it looks deceiving, but his heel goes right to the bottom). I found them at The Shoe Company in Signal Hill. My 4 year old is wearing a pair of Sorel Flurry's that have a fairly flexible sole. It is a challenge to find minimal boots for kids and it's one area where I find 'good enough' and then supplement with lots of indoor barefoot time with varied textures through the winter. (Click here to read about keeping your feet healthy in the winter - this applies to kids too!)
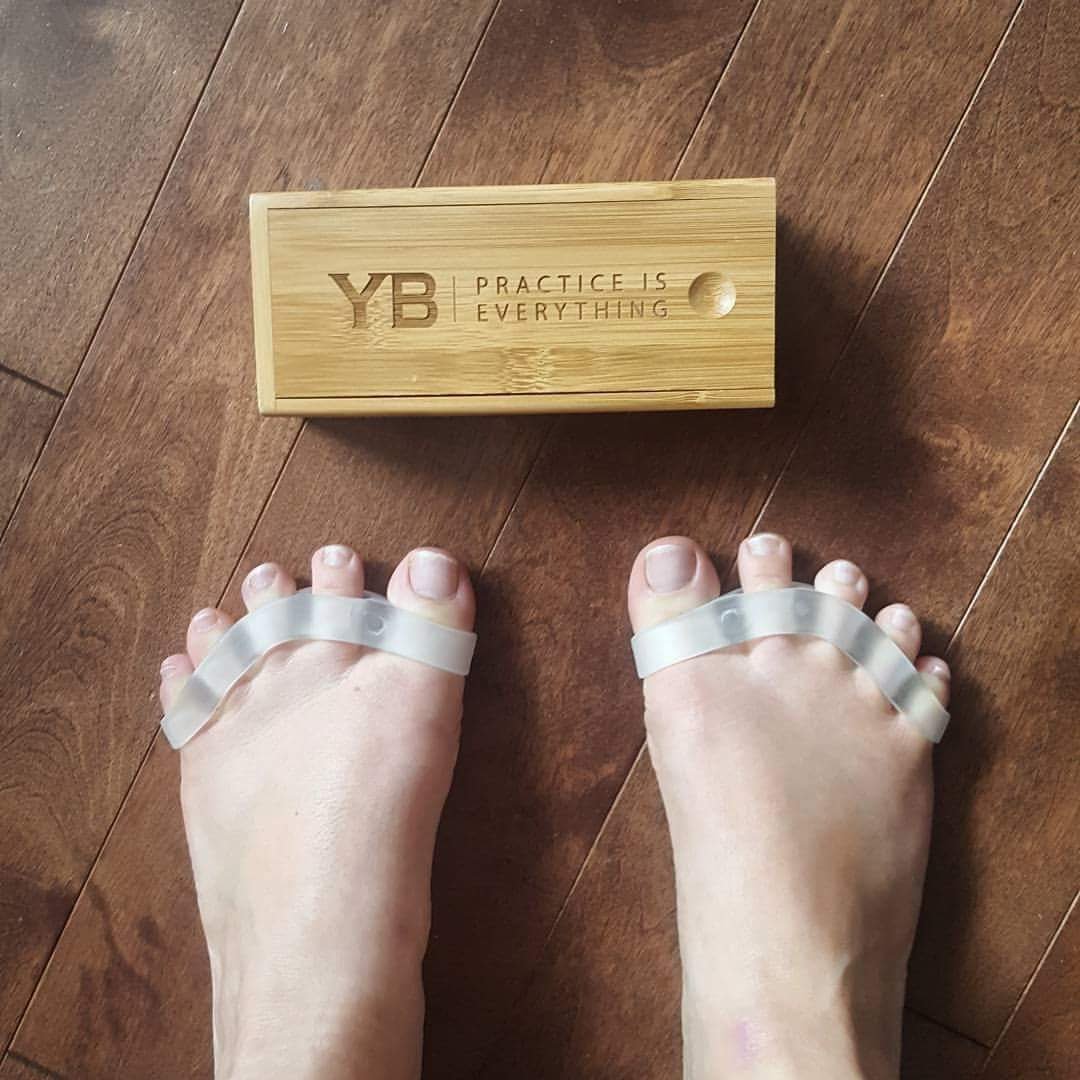
You can find more minimal boots here as recommended by Katy Bowman on her Winter Shoe List. 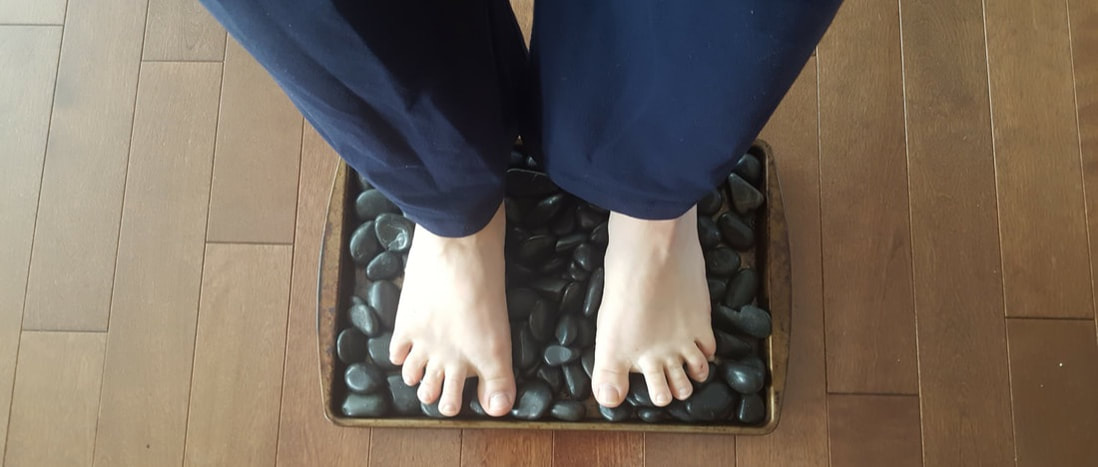 Ultimately, barefoot time is essential to foot health. Time spent walking over varied terrain, different textures and temperatures are all vital inputs to the feet. But ... when you live in a cold weather climate, it's likely not feasible to be outside barefoot many months of the year. So we need to be proactive in maintaining foot strength during the winter months. There are many tools I use to mobilize my feet indoors, including alignment socks, toe spreaders, balls and rocks, foot massage and appropriate footwear. 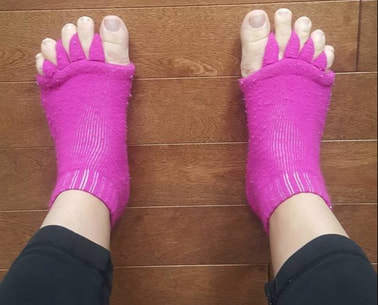 Tool #1: Alignment Socks A pair of alignment socks will help to spread your toes without you having to think about it. I wear these after a shower and some coconut oil to my heels, and I sleep in them. You can buy alignment socks here or here. Tool #2: Toe Spreaders Toe spreaders can be worn around the house or in your shoes (if your shoes are wide enough!). I have two different kinds; Correct Toes (top left) and Awesome Toes (top right). You can buy correct toes (with free shipping to Canada!) here and the awesome toes here. 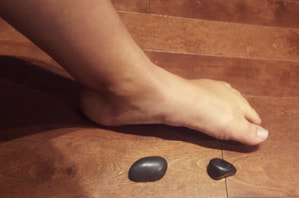 Tool #3: Rocks or Small Balls I use a small soft squishy ball or a hard bouncy ball or a rock to give the 33 joints of my feet movement and pressure nutrients they don't get when I am not walking barefoot outside (size, shape and density of the ball will affect intensity of foot mobilization). 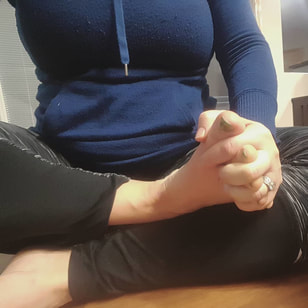 Tool #4: Foot Massage Holding hands with your foot and stretching your toes (toe splits) will increase circulation to your feet. Bonus: it also stretches your hips! Tool #5: Temperature Sometimes, just for fun, I will challenge my feet with cold temperature. Usually to run and put the garbage or recycling out. But always exhilarating!  Tool #6: Choose flat, flexible, wide footwear Look for a winter boot that will not only keep your feet warm, but that is flat, flexible and wide enough for your feet to function while inside them. Here's to healthy feet all year long! minimal shoes that ship to calgary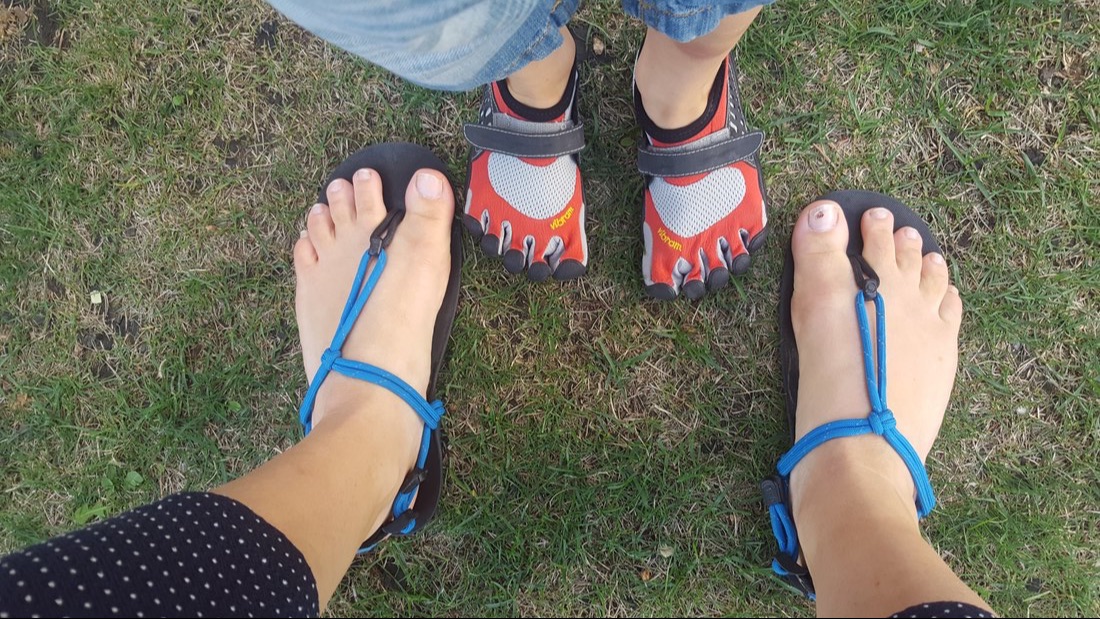 I am working hard to promote my favourite minimal shoe companies to local businesses, but in the meantime, here are some tried & tested minimal shoes that I LOVE that ship to Calgary (or elsewhere in Canada).
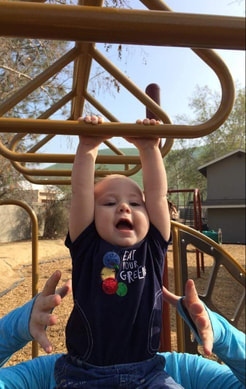
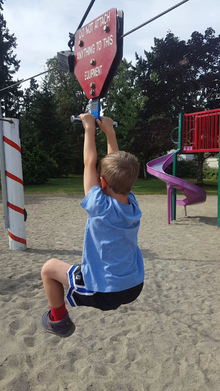
Most of these companies have extensive sizing guides to help you decide what size to order. I've given my favourite shoe for each company, based on my experience. MOST* styles for the companies below are minimal and awesome. Shipments to Canada may be subject to customs, import duties, taxes, etc. These additional costs are the responsibility of the buyer and are not included in the cost of shipping. All opinions are my own. I have not been compensated in any way to suggest these companies! Merrell Shipping cost to Canada: FREE Return policy My favourite shoe: Vapor Glove *Merrell is the only company on this list that also sells positive heeled, rigid shoes. I include them because they do make a few barefoot styles, and vapour glove is my all time favourite 'athletic' shoe Xero Shoes Shipping cost to Canada: ~$11.00 USD per pair Return policy My favourite shoe: ALL OF THEM! Earth Runners Shipping cost to Canada: $8-19 USD Return policy My favourite shoe: Elemental Sandals Lems Shipping cost to Canada: $12.95+ USD Return policy My favourite shoe: Nine2Five *good men's business shoe! Vivobarefoot Shipping cost to Canada: $12 (free on orders over $100) Return policy My favourite shoe: Stealth Soft Star Shoes Shipping cost to Canada: FREE Return policy My favourite shoe: Solstice Sandal Unshoes Shipping cost to Canada: ~$15 USD Return policy My favourite shoe: Keota Sandal Luna Shipping cost to Canada: FREE over $100 Return policy My favourite shoe: Oso Flaco Drifter Leather Shipping cost to Canada: *Ships from Greece - as the shoes are made to order and currently fully booked, I couldn't find a shipping cost Return policy My favourite shoe: Helia Sandals Vibram Five Fingers Shipping cost to Canada: $20 (free over $150) Return policy My favourite shoe: Alitza Loop If you're looking to try something not on this list, I stumbled across this great resource: www.journeytobarefoot.com. Here you will find extensive lists for men, women and children. The most important thing I want you to remember when shopping for shoes is to look for Flat, Flexible, Attached and Wide shoes (FFAW). That way you can walk into any shoe store and decide if a shoe is right for you. The heel of the shoe should be no higher than the toe of the shoe (Flat). The sole should be flexible; you should be able to twist and roll the shoe (Flexible). The shoe should be ‘attached’ to your foot; nothing like a flip-flop that requires you to clench your toes just to keep it on your foot (Attached). And the shoe should be wide enough for your toes to spread out with every step (Wide) . If you want to learn more about why minimal shoes are a step in the right direction towards healthier feet, read Simple Steps to Foot Pain Relief . Remember that choosing minimal footwear is only half of the equation. To safely transition to wearing more minimal shoes, read Whole Body Barefoot: Transitioning Well to Minimal Footwear . 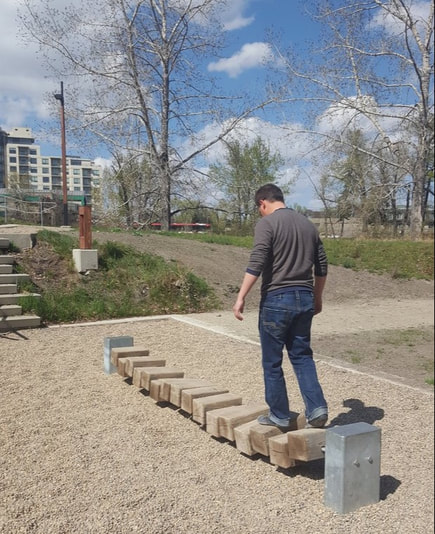 10 Fun Things to Do at the Playground with your Kids We spend a lot of time at playgrounds. We often go 'playground hunting' and find new playgrounds in other areas of the city. My kids love to climb and jump and use their imaginations to play for hours, and I often find myself with chunks of time to play and move while they play and move. I'm often the only adult on the playground too ... so get in there and #stackyourlife by playing with your kids, enjoying some outdoor time and adding movement to your day. 1. Balance on something On anything! Try walking along a balance beam, the edge of a park bench, or find this playground (photo above) at St. Patrick's Island in Calgary where you can attempt to walk across the wooden blocks without falling!  2. Don't touch the ground! Try to get from one end of the playground to the other without touching your feet on the ground. 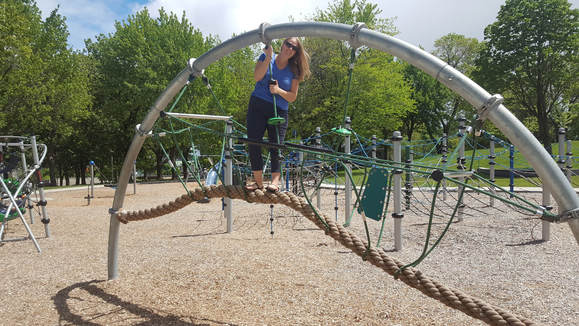 3. Climb Something!  4. Hang from Something Lateral hang or supported hang counts too! Make sure to keep your ribs down! (My littlest was only 9 months old in this picture - you can start hanging very young!)
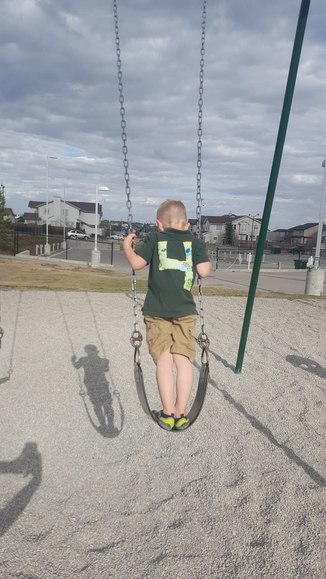
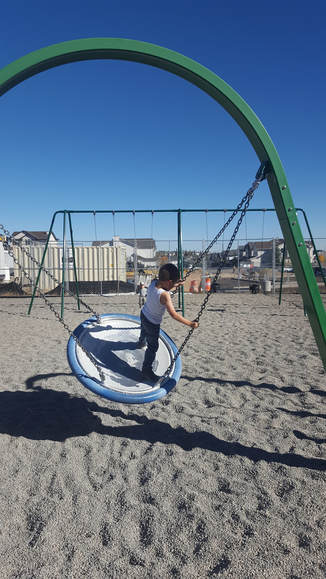
5. Swing standing up Bonus points if you stand up and sit down while the swing is 'swinging'!
6. Kick off your shoes 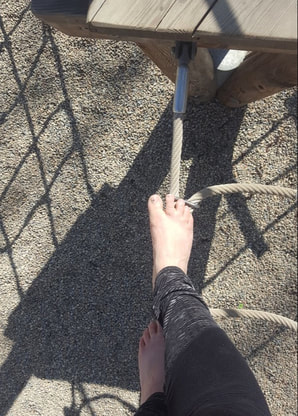 7. Play 'catch me if you can!' We like to pretend one person is a wolf, or a monster, or a crocodile. Make up your own rules. It's basically a game of tag, but with more imagination. 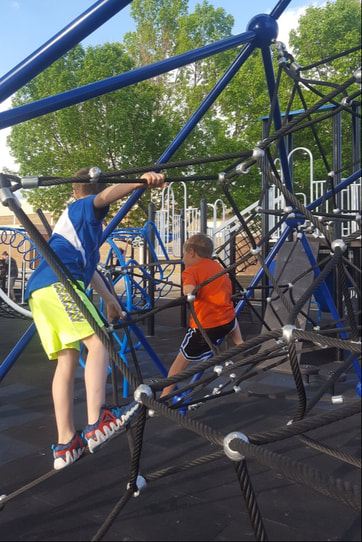 8. Lie down in the grass and look at the sky Looking at something far away is a good break for your eyes. See who can come up with the coolest shape in the clouds.  9. Climb UP the slide 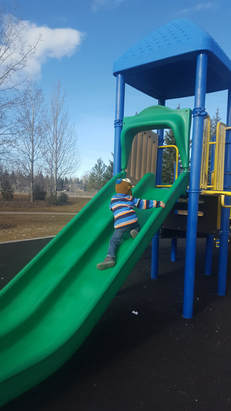 10. Crawl across the playground 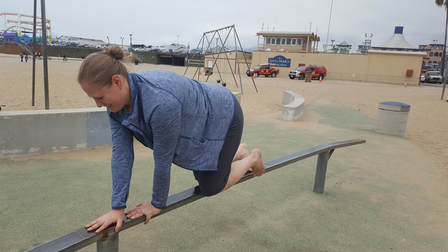 *In writing this article, I realized I have very few pictures of myself at the playground, and tons of pictures of my kids. So just use your imagination - everything they do, I try to do too!
|
AuthorRosanna Taylor, MSc, RES-CPT Archives
April 2024
Categories |


 RSS Feed
